
One of the best ways to minimize time in your inbox is to use Gmail’s rules. Here’s a tutorial on how to create rules in Gmail to work smarter!
Everyone uses email these days, and everyone gets a LOT of emails. Whether you’re managing an inbox for personal or for work use, it can easily get disorganized or overwhelming to stay on top of all of the information coming in. One way to help automate your inbox work flow is to create rules in Gmail that can filter, star, move, or label and email for you. One sixty-second setup can save you hours of time in the long term! Here’s how to create and use a Gmail filter.
Reasons you might want to create a filter:
- To have an email you need but don’t need to regularly see skip your inbox, move to your archive, and get marked as read
- To automatically apply a label
- To automatically star an email and move it to a “followup” section of your inbox
- To do all of the above!
How I Use Gmail Rules:
I use Gmail Rules to filter, forward, star, label, and move emails that I get on a regular basis. For this example, I’m going to show you how I manage emails I get from people interested in the skincare I sell that I follow up with recommendations. Instead of having to see 10-20 skincare quiz emails a day come through my watch or phone alerts, I know that whenever I come back to my computer, I’ll have them waiting for me in my Starred.
How to Create Rules in Gmail
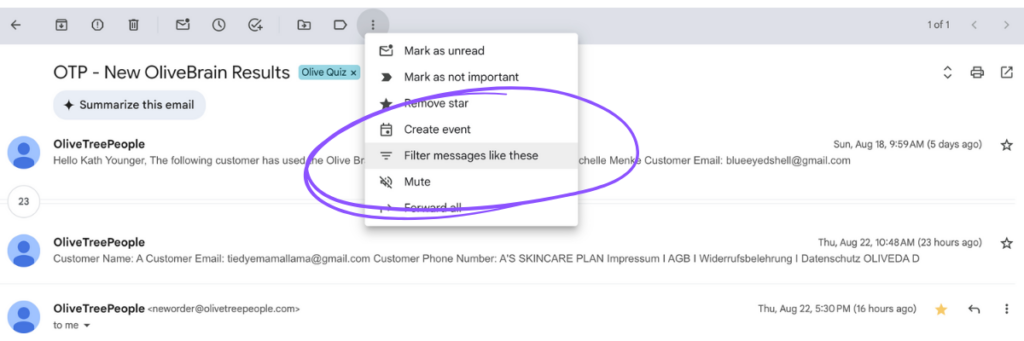
Step 1: Find the email you’d like to filter
This might take a few tries to get perfect. The easiest way to do this is to go to an existing email you’d like to filter, click on the vertical dots, and find “filter messages like these” in the toolbar at the top.
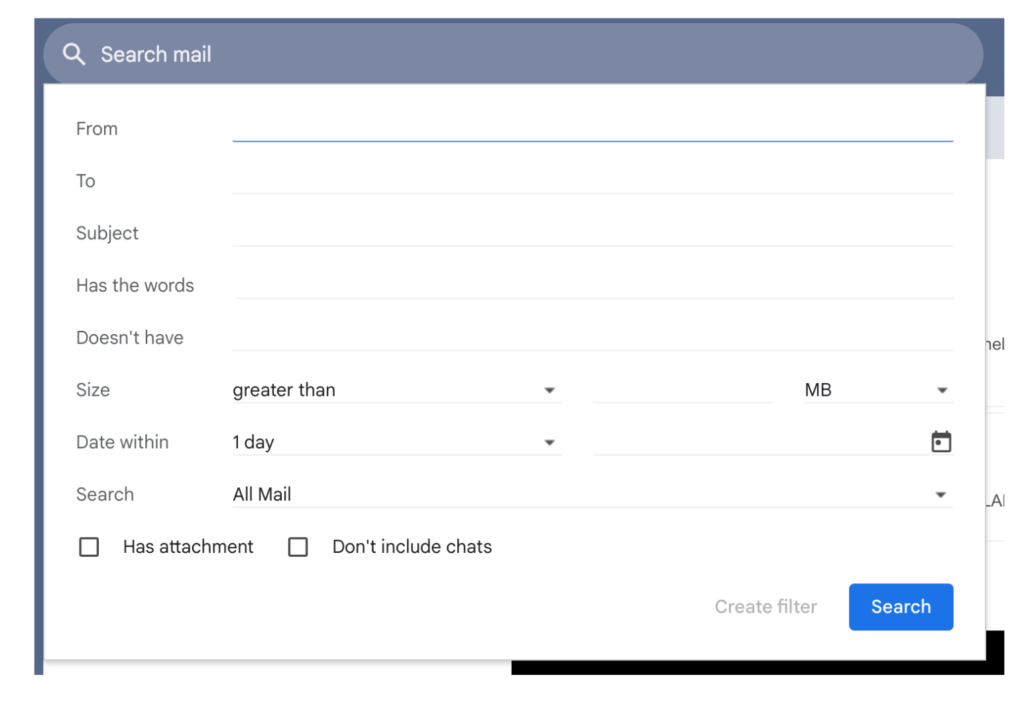
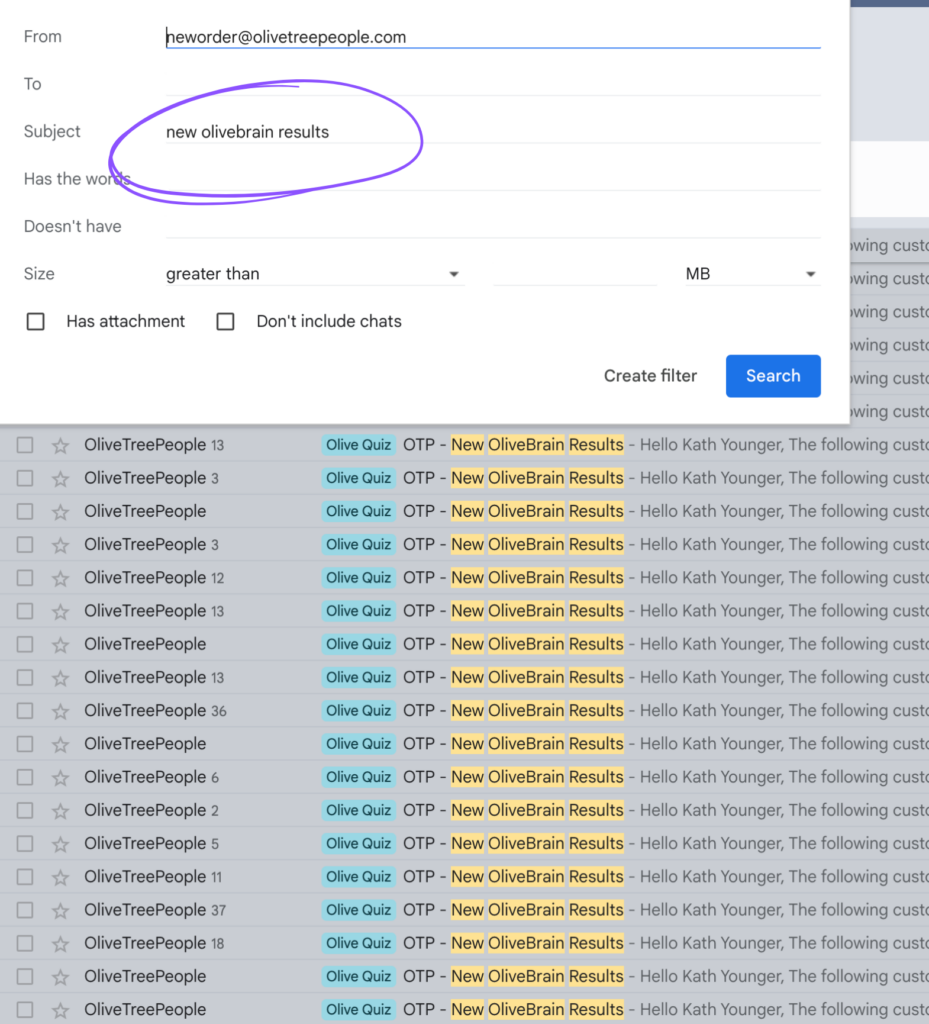
You can also create a filter from scratch using the To: or From: settings, keywords in the subject line, or other parameters. Hit “show search options” on the right hand side of the search bar to bring up this form.
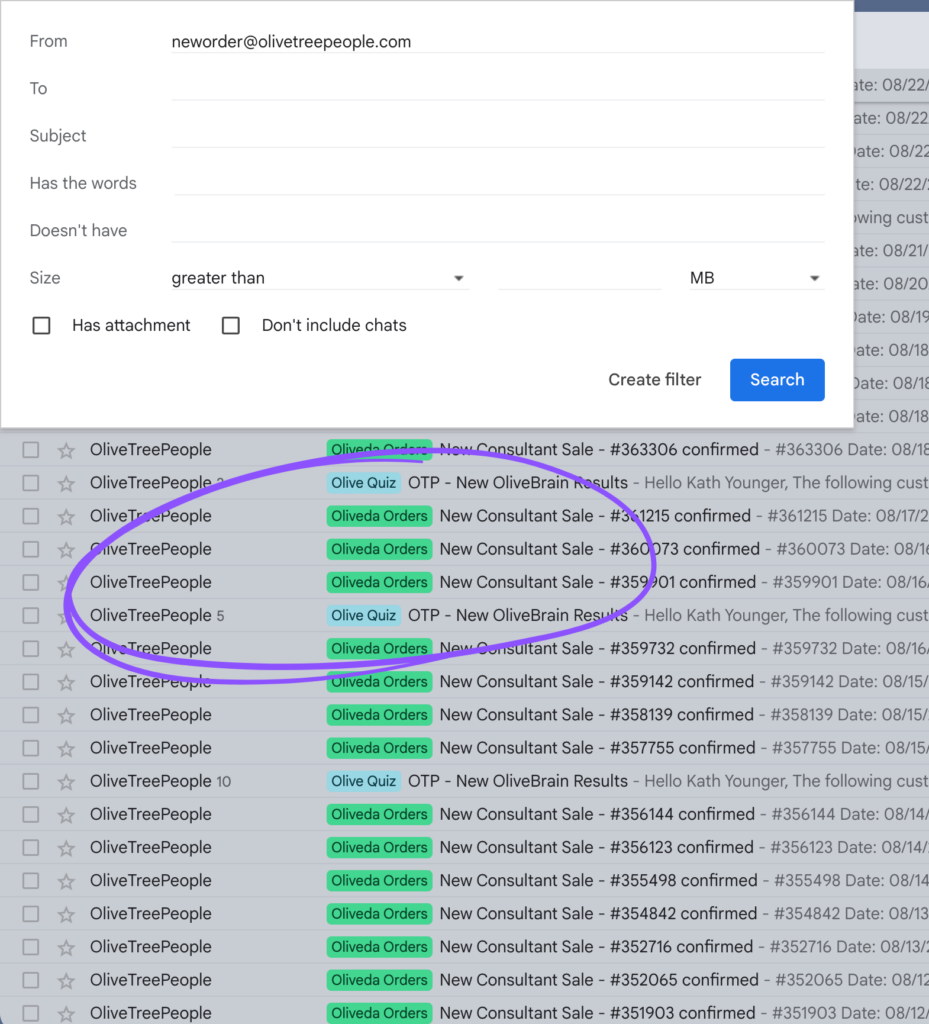
Step 2: Search for your parameters
To check your work, hit search. You can see when I hit “create filter” on the specific email, it defaulted to the sender. I had to further clarify in the search criteria that I only wanted the quiz emails to be a part of this filter, so I added the subject line to distinguish.
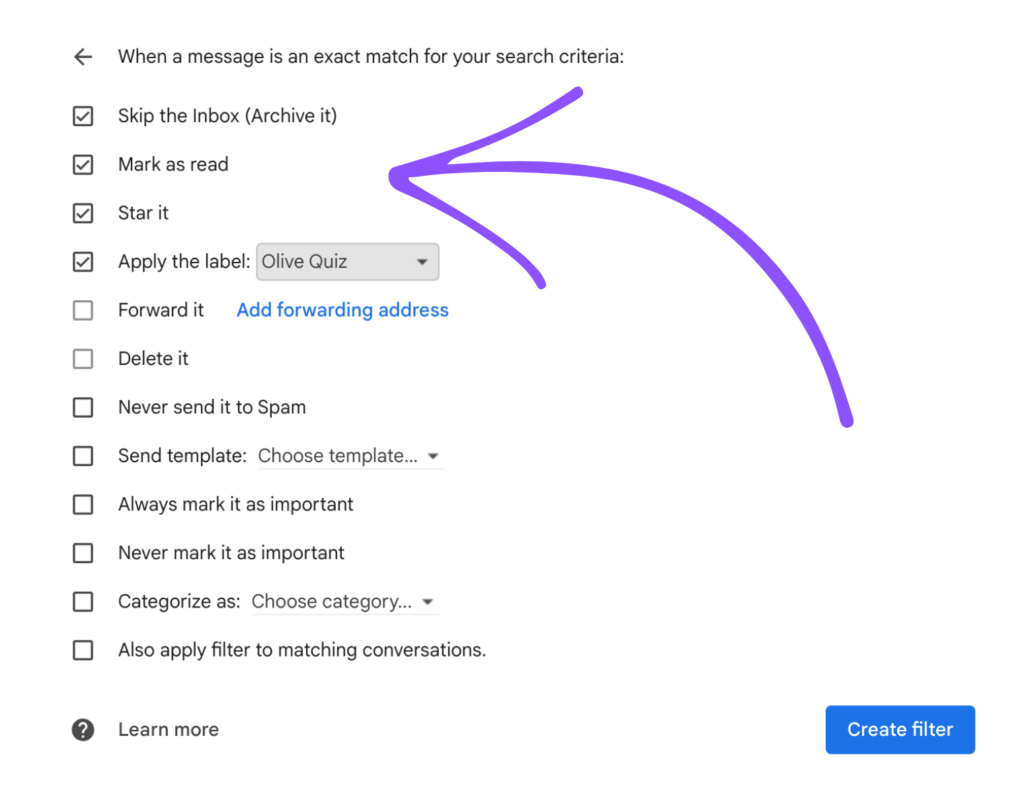
Step 3: Click Create Filter
Once you have your filter criteria matching the emails you want to automate, hit create filter. You’ll see there are a handful of actions you can choose from – and you can choose multiple! In my case, I chose Skip the Inbox (archive), mark as read, star it, and apply the label Olive Quiz. But look at all these fun options! You can even have it auto respond with a pre-written template or forward it to another person.
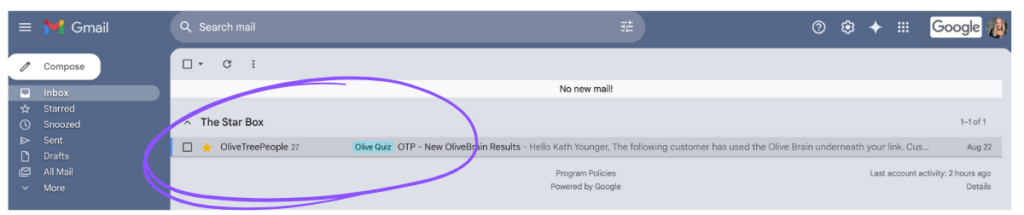
Step 4: Test
The next time your filtered email comes through, check to make sure it landed where you told it to land. Mine did just as promised!
If you need to manage your Gmail rules in the future, go to Gmail settings by clicking the gear and look for “filters and blocked addresses.” Here you’ll see a list of your filters and you can delete or edit any you need to change.
How to Automatically Forward Emails in Gmail
Another rule you might want to implement is email forwarding. While you might use the email filters above to forward just one type of email on, you also might want to forward a whole inbox. Many people have several emails that they might use for different purposes. But who wants to have to log in to multiple inboxes every day? Forwarding is a way to simplify that process so you can check just one email account and read everything in one place.
From the account you wish to forward FROM:
- Go to your Gmail account settings by clicking the gear icon in the upper right corner
- From Quick Settings, click “see all settings”
- Go to the tab labeled “forwarding and POP/IMAP”
- Add a forwarding address (note: you may be asked to verify your identity)
- You’ll get a link to your forwarded TO email to confirm you’d like to set this up
- Once confirmed, you can adjust the settings in the forward FROM account by noting if you’d like to keep the email as is, mark it as read, archive it, or delete it.
How to Create a Group in Gmail
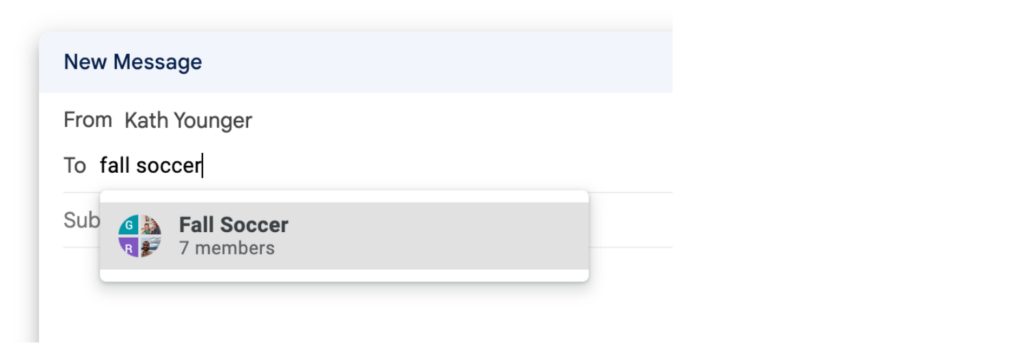
Another way to save time in your inbox with a rule is to create a group. If you’ll be emailing a group of people frequently, it’s so easy to do this with a Gmail Group in your contacts versus copying and pasting a list of emails each time or replying to the same email chain over and over. A perfect example of this for me: I create a group for my soccer team each season and whenever I have a team announcement I can just type “Fall Soccer” into the To: address and my group autofills!
Here’s how to do it:
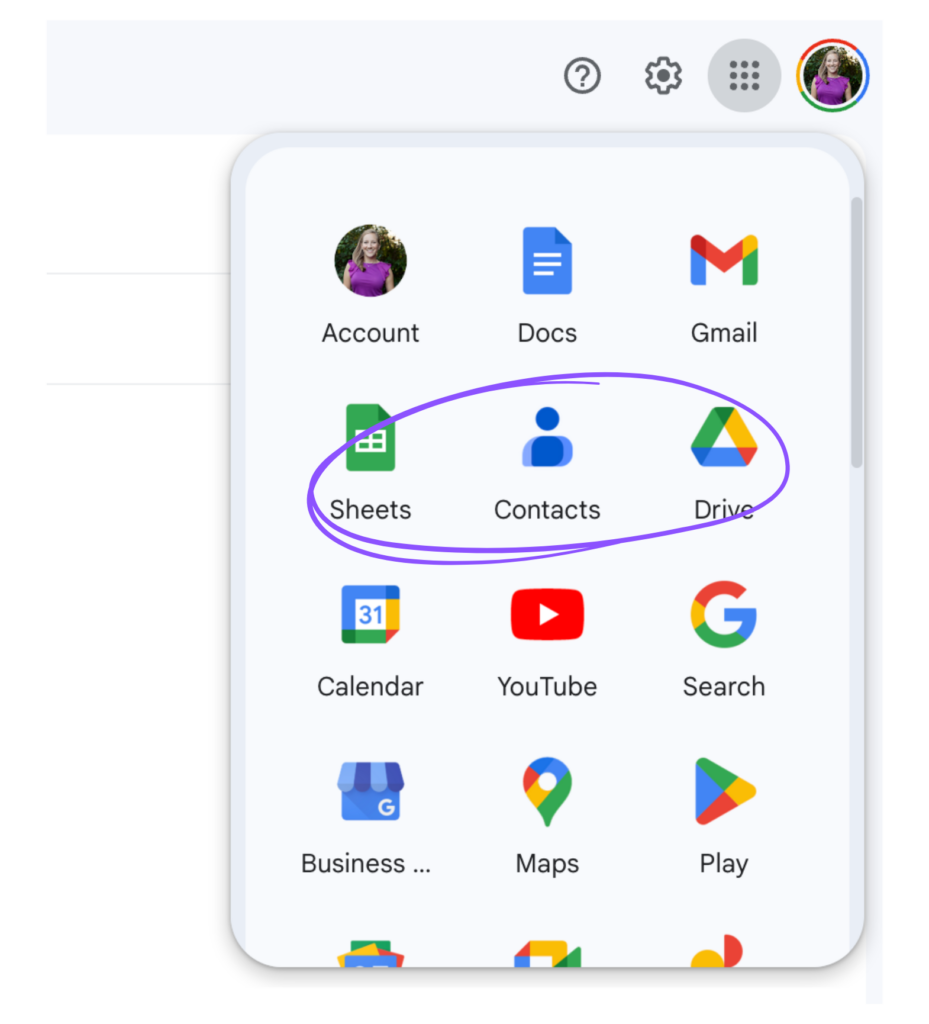
- Open your Google Contacts from the upper corner of your Google Suite in Gmail.
- Make sure those you’d like to add to your group are in your Google Contacts.
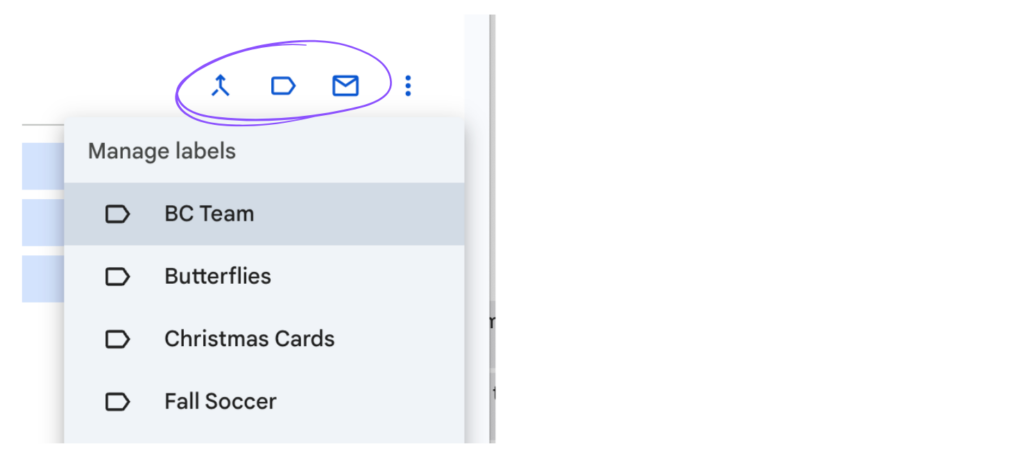
- On the left sidebar, hit “Create new label.”
- Search for and select the contacts you’d like to group and look for the label icon. Add them to the label.
- When you’re ready to email the group, just type in the label name and the group will autofill!
Feeling Motivated To Keep Going?!
Looking for more tips? Check out How To Organize Gmail or my Digital Clutter Course that covers all things getting organized online including email, photos, calendar, files, paper, and money!